The Best Backpacks for Beginners, Chosen on Torso Fit
Every pack here is sold by the number of liters it holds. Not one of them will be comfortable if it does not match your torso, which is the measurement nobody takes.
Torso length, not height, decides which pack fits. Measure from the bony bump at the base of your neck to the imaginary line between the tops of your hip bones, and buy a pack whose published range covers that number. A pack that does not match your torso puts the load on your shoulders instead of your hips, and no amount of strap adjustment fixes it. Two people of identical height often measure two inches apart.
The bump is your C7 vertebra: tip your head forward and it is the one that sticks out most. The bottom point is the top of your iliac crest — put your hands on your hips, thumbs back, and the line between your thumbs is it. Have somebody else run the tape; measuring your own back accurately is close to impossible.
Pack
Volume
Torso range
Weight
Access
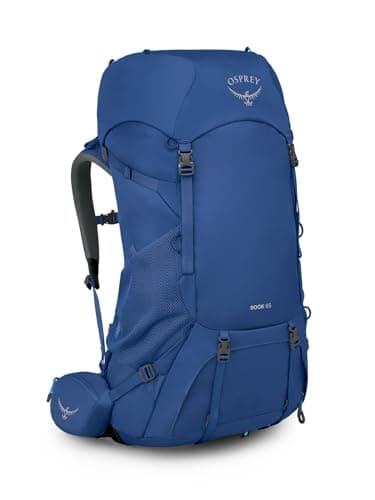
Osprey Rook 65
65 L
18-22 in
3.6 lb
Top plus front zip
TETON Scout 3400
55 L
15-19.5 in
4.5 lb
Top plus bottom sleeping bag zip
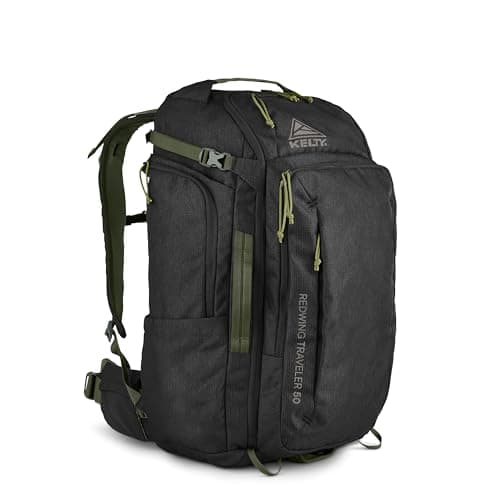
Kelty Redwing 50
50 L
16-20 in
3 lb 4 oz
Panel access
All figures as published by the manufacturers.
How much volume, honestly
The instinct is to buy large, because a big pack can always be packed light. It cannot, in practice, because a half-empty pack sags and shifts and the empty space gets filled with things you did not need. Buy for the trip you will take six times, not the trip you might take once.
For one or two summer nights carrying your own share of a shelter, 45 to 55 L is right. For three or four nights, or for spring and autumn where the sleeping bag is bulkier and you carry more layers, 55 to 70 L. Above 70 L you are into expedition territory, and the honest answer for a beginner is that the extra volume mostly buys you a heavier pack.
The mistake that ruins the first trip
Almost every uncomfortable first backpacking trip comes down to the same thing: the hip belt is riding above the hip bones, so the pack hangs off the shoulders. Load the pack, loosen everything, put the belt so its padding wraps the top of your hip bones, tighten the belt hard, then snug the shoulder straps until they touch without carrying, then set the load lifters to about 45 degrees. If your shoulders hurt after an hour, redo it in that order.
What we did not consider
Ultralight frameless packs are excellent and are the wrong first purchase: they demand a light kit before they are comfortable, and a beginner's kit is not light. Women's specific and youth models exist for all three brands here and are frequently the better buy — the differences are torso length, shoulder strap shape and hip belt angle, all of which matter. Check the fit range for the exact model you are buying rather than the family name.
We have not tested any of these packs, carried them, or weighed them ourselves. Every number above is the manufacturer's published figure with the source linked, which is the only kind of number this site publishes. More on that in how we research.
Then learn to pack it
A correctly sized pack that is badly loaded still feels wrong — weight too low pulls you backward, weight too high makes you unstable on uneven ground. How to pack a backpacking backpack covers the three zones and what goes in each. If this is your first trip, the beginner backpacking gear list is the companion piece.
The picks in full
1. Best first pack for most adults
Osprey Rook 65
Osprey
65 L with an adjustable back panel covering 18 to 22 in, an integrated rain cover, and a published 30-40 lb load range.
Osprey publishes 65 L, 3.6 lb (3.9 lb in the extended fit), a torso adjustment range of 18 to 22 in on an injection-molded ladder-lock system, a load range of 30 to 40 lb, and an integrated rain cover.
The adjustable back panel is the reason this is first. A beginner does not yet know their torso measurement, is frequently buying online, and may be buying for someone still growing. A four-inch adjustment range absorbs a measuring error that would make a fixed-length pack unusable, and it means the pack survives a house where more than one person uses it.
The rain cover matters more than it sounds. Pack fabric is coated, but seams and zips are not, and the first thing most people learn on a wet trip is that a “water resistant” pack transmits a surprising amount of water to a sleeping bag. A cover that lives in its own pocket is a cover you still have on the day it rains.
The drawback
3.6 lb before you put anything in it, and 65 L is more volume than a summer weekend needs. Empty space gets filled.
2. Best for shorter torsos, teenagers and growing kids
TETON Sports Scout 3400
TETON Sports
55 L over a 15 to 19.5 in adjustable torso range, with a 26 to 60 in waist belt and a 3 L hydration sleeve.
TETON publishes 3,400 cu in (55 L), 4.5 lb, an adjustable torso range of 15 to 19.5 in, a waist belt adjustable from 26 to 60 in, a 600D diamond ripstop shell and a 101 oz hydration capacity.
That torso range is the point. Most adult packs start around 17 or 18 in, which leaves shorter adults and every child under about fourteen with a pack whose hip belt sits on their ribs. Starting at 15 in is unusual and genuinely useful, and the enormous waist belt range means the same pack fits a slight teenager and a large adult.
You pay for that in weight. At 4.5 lb this is a pound heavier than the Kelty and nearly a pound heavier than the Osprey, which on a first backpacking trip is roughly a liter and a half of water you are carrying for nothing. For a first season, where the question is whether the family enjoys it at all, that is a reasonable trade.
The drawback
4.5 lb, the heaviest here by nearly a pound, and 600D fabric is chosen for cost rather than for weight.
3. Best for weekends, and the easiest to live out of
Kelty Redwing 50
Kelty
50 L at 3 lb 4 oz over a 16 to 20 in torso range, on a perimeter frame with FIT-Pro adjustment.
Kelty publishes 50 L, 3 lb 4 oz, external dimensions of 27 x 18 x 10 in, a torso range of 16 to 20 in, a perimeter frame, the FIT-Pro torso adjustment and an AMP-Flow ventilated back panel.
The Redwing's reputation is built on access. A traditional top-loading pack is a tube: the thing you want is always at the bottom, and finding it means unpacking on wet ground. Panel access changes how you live out of a pack, and for a beginner who has not yet developed a packing system, that is worth more than a few hundred grams.
50 L is the right size for the trips most people actually take, which is one or two summer nights. It is not the right size for a shoulder-season trip with a bulkier sleeping bag, and it is not the right size if you are carrying a child's share as well.
The drawback
50 L runs out on longer or colder trips, when a winter bag and more food stop fitting. Published weights vary by model year and gender fit.
QWhat size backpack do I need for beginner backpacking?
For one or two summer nights, 45 to 55 liters. For three or four nights or shoulder-season trips with a bulkier sleeping bag, 55 to 70 liters. Torso fit matters more than volume: a 65 liter pack that does not match your back will be less comfortable than a 50 liter pack that does.
QHow do I measure my torso for a backpack?
Measure from the C7 vertebra, the bony bump at the base of your neck when you tip your head forward, down to the imaginary line between the tops of your hip bones. Have someone else hold the tape. Buy a pack whose published torso range covers that number.
QIs a 65L backpack too big for a beginner?
It is more volume than a summer weekend needs, and empty space tends to get filled. It is not a mistake if you camp in colder seasons or carry part of someone else's load. If you only ever take one or two summer nights, 50 liters is the more comfortable choice.
QDo I need a rain cover for my backpack?
Pack fabric is usually coated but seams and zips are not, so a soaked pack passes water to whatever is inside. Some packs include a cover, as the Osprey Rook does. A heavy-duty bin liner inside the pack does the same job for almost nothing.
How we picked
Everyone else in this category will tell you they tested twenty of these. We have not tested any of them, and we would rather say so than pretend. There is no gear closet here and no test lab.
What we did instead: pulled the published specifications from each manufacturer's own spec sheet or manual, named the standard behind every rating so you can check what it actually promises, did the arithmetic that turns a spec into a decision, and pulled today's real retail price rather than quoting one from memory. Every pick states a drawback, because a list where nothing is wrong with anything is an advert.
The limits of that method, stated plainly: published specs do not capture zipper quality, seam durability, or how a tent behaves at 2am in a storm. Where that matters, we say so on the pick. The full method is here.